I am by no means a clean freak. That would be impossible with having three dogs and two small kiddos but I do LOVE to organize. As our family has grown, so has my need for improved organization. Let's face it, kids require a lot of junk and I need a way to keep toys on the main level of our house without feeling like we live in a Fisher Price jungle.
A cube organizer is perfect for holding all sorts of kid stuff (toys, diapers, wipes, extra outfits, etc). I bought a nice and sturdy one along with coordinating fabric drawers to match my decor.
The cube organizers can be pricey, but I see it as an investment toward my sanity.
Now that I have this awesome new organizer, I wondered,
How can I keep this from becoming just a bunch of junk drawers? How can I keep my cube organizer, organized?!
Yep, definitely need labels for the drawers....aka a good excuse for a craft project!
Note: Some drawers now come with little pockets to put labels on- genius! Unfortunately, when I bought mine, those were not on the market.
Besides, homemade labels are way cuter!
Labels for Your Fabric Drawers
Materials Needed (makes nine labels):
3 yards of 1/2" wide ribbon
9 mini chalk boards (could also use mini picture frames)
1.5 yards of twine (or other embellishments)
label maker (or a fine-tip white permanent marker)
scissors
hot glue gun
I purchased the supplies at a local craft store. The only tricky supply to find were the mini chalk boards. I found them in the scrapbook section of the store. I've also seen them in the wooden project section.
Prepping the Materials:
I cut the ribbon into nine 12 inch pieces, folded each one in half, and cut a fishtail at both ends.
I cut nine 6 inch pieces of twine and tied the them into nine little bows.
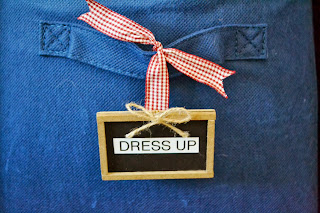
I made labels with my handy, dandy label maker but if you don't have one, you can simply write on the boards with white permanent marker. I have my drawers labeled: cars, babies, animals, blocks, dress up, musical instruments, books, and two have my kids' names on them.
Putting the Labels Together:
For each board, I placed the label in the middle and hot glued a twine bow to the top. Next, I flipped the board over and hot glued the ribbon to the back.
The ends of the ribbon should be pointed up above the top of the board. After everything was completely cooled, I tied the labels to the handles of my drawers. Voila! Lovely Labels!
The great thing about this project is that you can pick out ribbon, boards, and embellishments that match your decor for a completely original look. Good luck with this simple way to organize and embellish your junk hiders.
Happy Crafting!